One idea a week!
Tutorial – A trinket dish, plant pot, sugar bowl, or storage container

We love having a cup of coffee… Last week, just as I was pouring it, I thought to myself, “Hey, we could use a little sugar bowl…” We do have a big box, but it’s a bit bulky.
Since I was racking my brain over what to do with our new velvet fabrics, fresh off the press, and I had right in front of me a little storage pouch that I use to hold my scraps and threads when I sew, the idea just came to me!
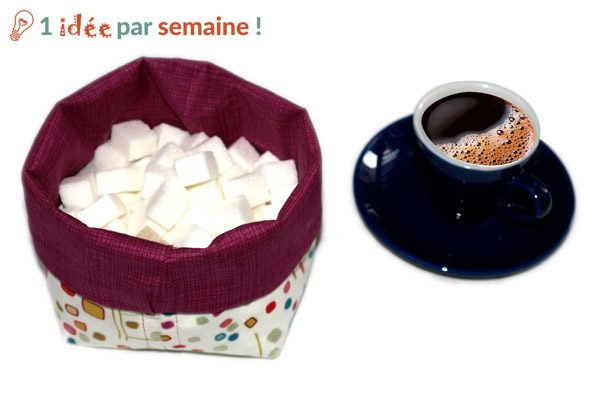
So here it is, a little project you can finish in 30 minutes (yes, I really did say thirty minutes!). Okay, we drank the coffee BEFORE it was finished, I admit! For those who prefer to sew by hand, it’ll take a little longer, but when you love something, you don’t count the time! A trinket tray, plant pot cover, sugar bowl, storage bag… This little lined, machine-washable fabric tote can be used for anything and everywhere…
I made it small, but it can be adapted to any size. The ratio is simple: width = 2 times the height. Velvet holds its shape well and doesn’t sag easily, but to make a much larger item—such as a yarn ball organizer that’s about 40 cm tall—I would add interfacing or fusible batting to stiffen the lining a bit.
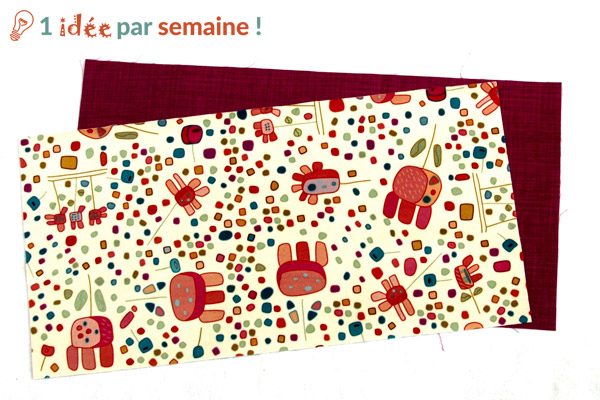
To make the small size, cut a 22 x 44 cm rectangle from the velvet and the lining. These measurements include 1 cm seam allowances.
Pin the short sides together, right sides facing, and stitch 1 cm from the edge.
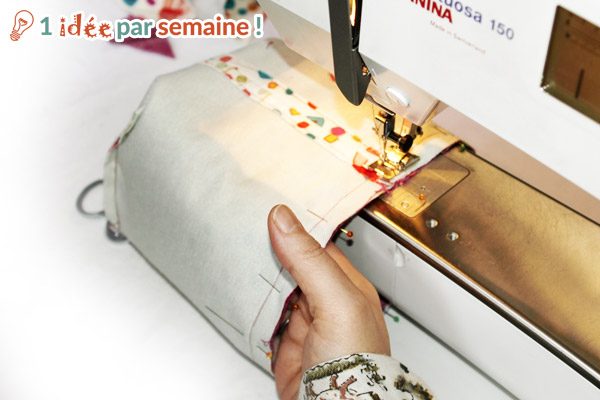
Topstitch the seam on the velvet section.
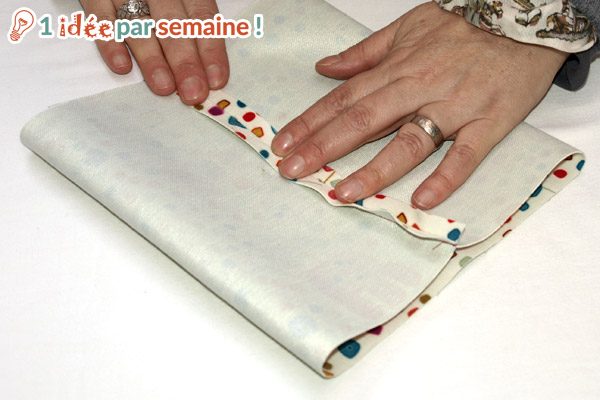
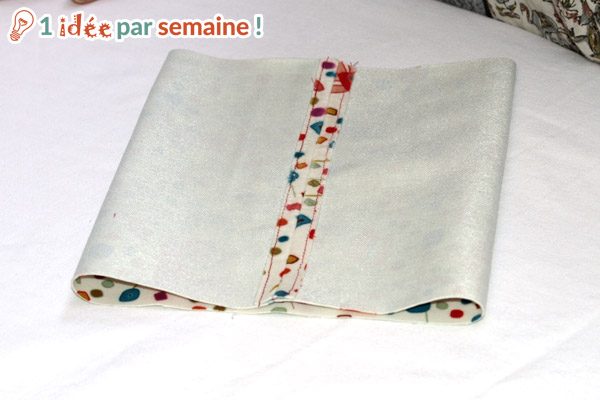
I topstitched at 7 mm to make sure I captured the entire seam allowance. Topstitching isn't necessary, but it gives a nicer finish and adds structure! Leave an opening in the lining.
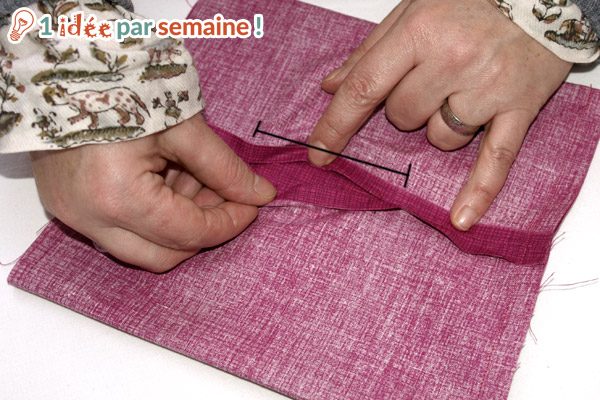
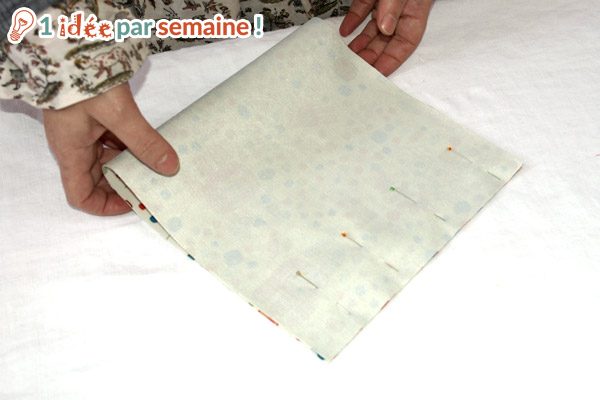
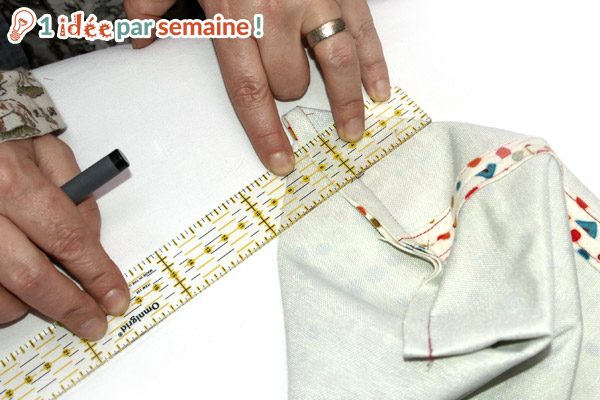
Pin the backing in place and baste 1 cm from the edge (for both the velvet and the lining), then mark a point 5 cm from each corner.
Flatten the pleats, making sure they are centered, and mark the seam line.
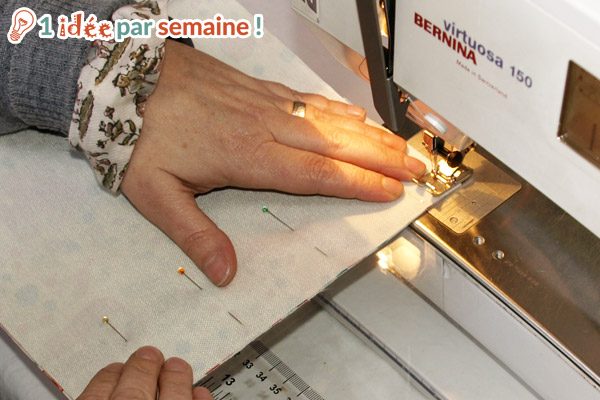
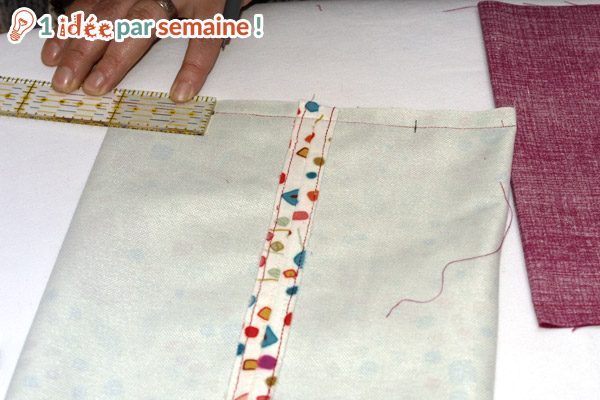
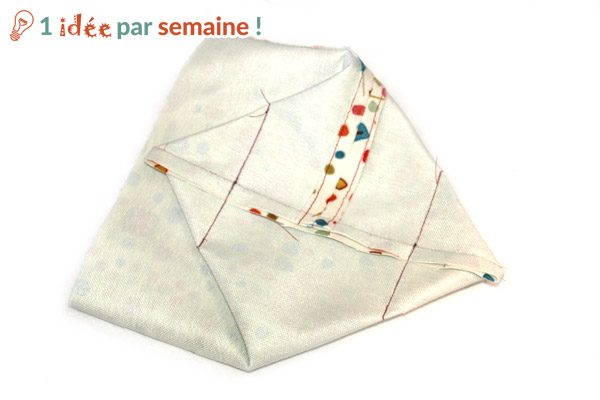
Pin the pleats, then trim off the excess fabric. Do the same with the lining.

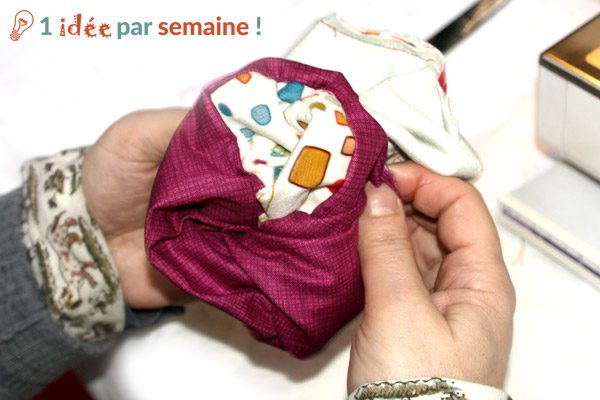
Slide the velvet piece into the lining piece, right sides together.
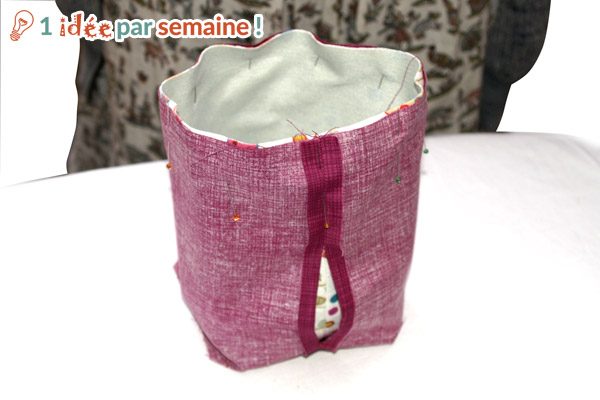
Pin carefully and sew 1 cm from the edge.
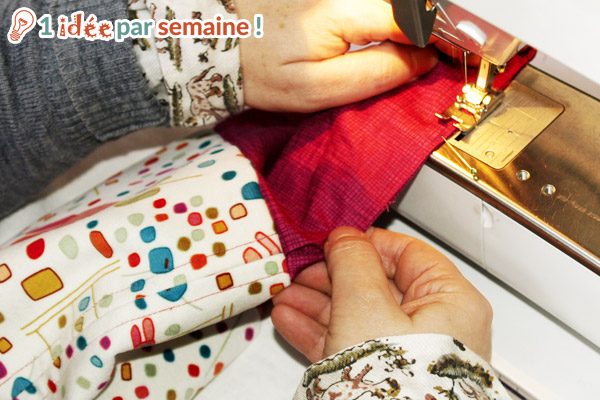
Turn the whole thing right side out and close the opening in the lining
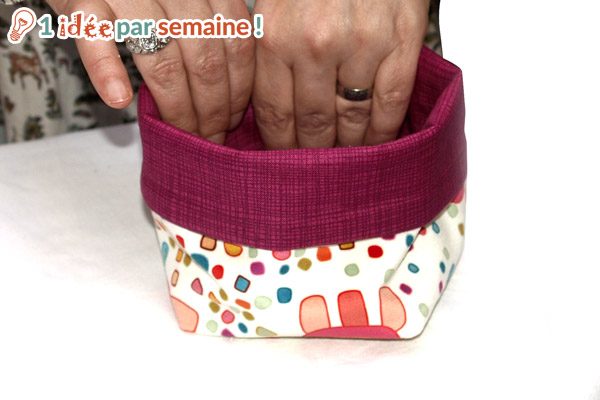
Way to go—it's over!
See you next week!
Awesome, thanks for the tutorial, and have a great day!
Great photos—thanks! 🙂
Thanks for this great tutorial—a little bin for storing the threads
Thank you for this lovely and practical pouch; this tutorial really makes me want to sew and patchwork.
I look forward to hearing from you soon.
Françoise
Awesome…!!
Your explanations are as great as ever—lots of ideas to try out. Hugs
Great! That’s perfect… I need a little thread bin on my counter… because, on top of everything else, I’ve gotten back into cross-stitch UFOs. Why are there only 24 hours in a day? Pfff… never enough time to do EVERYTHING…
Anyway, thanks for this lovely tutorial!
Hello!
Great job on putting together these tutorials! Great job on the clear explanations!
Lots of love!