One idea a week!
Tutorial – Installing the Zipper on Our Pouch with "Perfect Corners"

… And a little clip on the side!
This project requires a bit more attention to detail, but if you follow the step-by-step instructions carefully, even a beginner can do it.
Before cutting the lining for the pencil case, cut a 5-cm-wide strip from the fabric across the entire width (about 35 cm).
First, we make the two small tabs that will be attached to the zipper to create the "perfect corners."
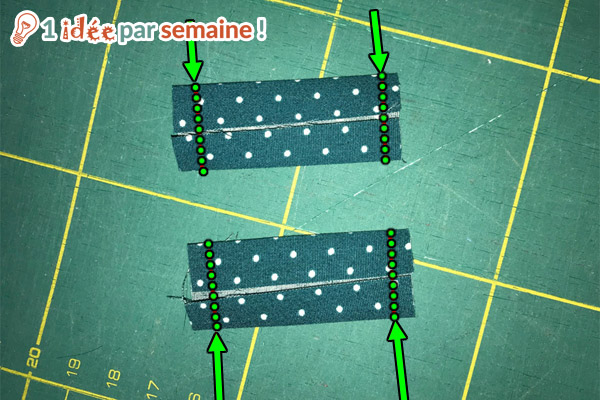
From the 5 x 35 cm strip, cut two 4 x 5 cm rectangles, then fold them widthwise toward the wrong side and press.
Once finished, the strips are 5 cm long and about 2 cm wide. Stitch each end.
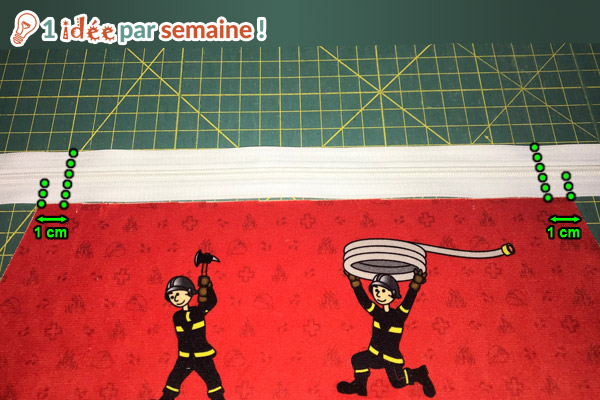
Mark the top of the pencil case on the zipper, which is intentionally too long: draw a small line (1) with a pencil on each side.
Next, draw a second mark (2) 1 cm inward from each line: these marks will help us position the interfacing tabs.
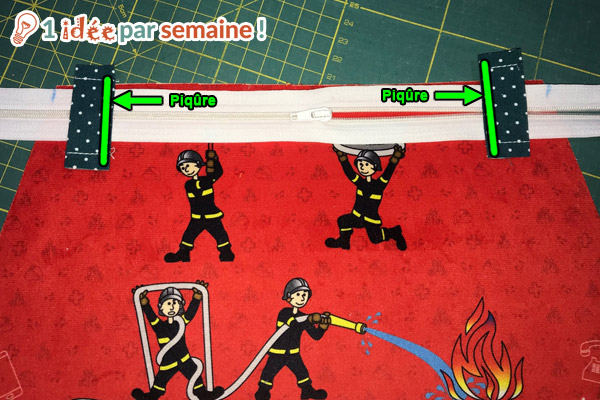
Unzip the zipper halfway, then pin the two small tabs to the zipper. The zipper should be facing you, and so should the tabs. The outer edge of each tab should lie along the line. Sew along the inner edge of each tab to secure them to the zipper. You can use a simple straight stitch or a zigzag stitch—whichever you prefer.
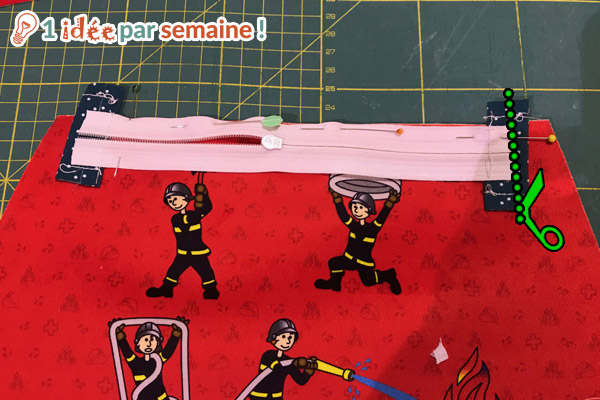
Next, trim the excess zipper material under each tab: nothing should stick out from the tabs anymore.
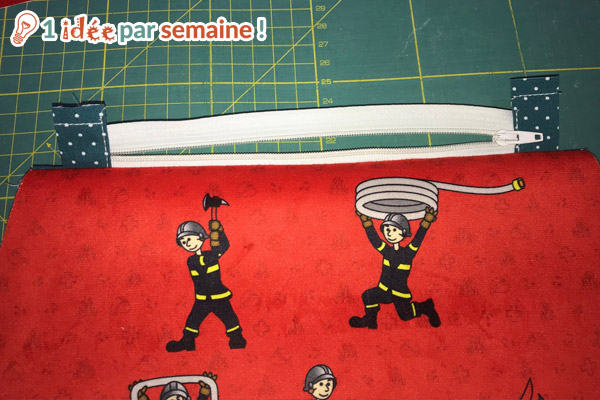
Pin the fastener to the first piece of velvet, making sure it’s centered. Place a piece of lining on top, right sides together. The two pieces must be perfectly aligned.
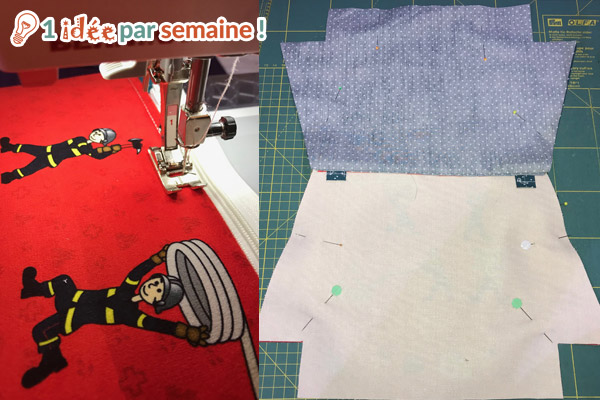
Next, stitch along the entire length using your machine’s “zipper foot.” It can be very narrow, like the one on my Bernina, or mesh-like, as on many other machines.
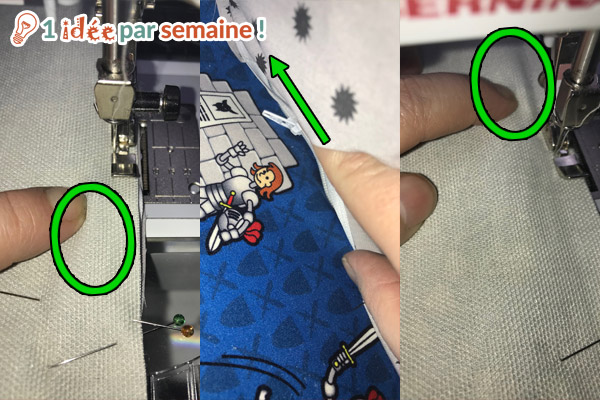
While sewing, the zipper slider may get in the way. Here’s a simple solution: sew until you’re about 2 cm from the slider; leave the needle in the fabric and raise the presser foot, then lift the fabric to reach the slider and slide it behind the presser foot.
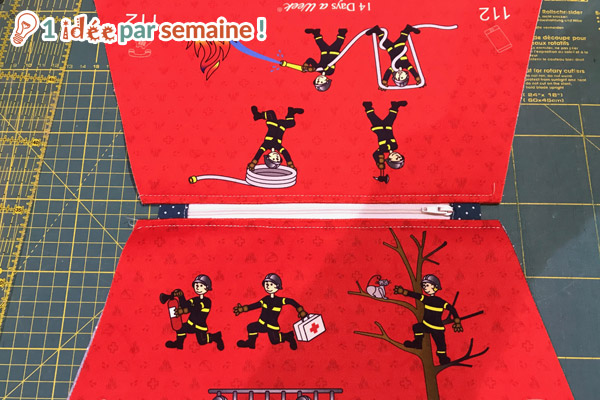
Lower the presser foot and continue sewing. Turn the fabric right side out; half the zipper is already sewn in!
Place the second piece of velvet on top of the first: the two horizontal edges must be perfectly aligned. Pin them in place, then attach the lining to the other side exactly as you did the first time. Sew the second side of the zipper: that’s it, it’s sewn in!

Now sew two rows of topstitching to prevent the lining from getting caught in the zipper when you open it. Before sewing, press the velvet and lining flat along the zipper. Sew about 4/5 mm from the edge of the zipper.
Making a Clip
Use the remaining 5 x 35 cm piece of fabric. To turn it right side out easily, first sew a longer piece of cord to one end of the fabric strip: this seam is temporary; the cord is used to turn the fastener right side out.

Attach the cord to the fabric. Fold the fabric right sides together, pin it in place, and sew along the edge 5 mm from the edge. Turn it right side out, holding the fastener firmly with one hand and pulling on the cord with the other. Once the end has slipped into the tube, the rest will fall into place on its own.
Cut a piece measuring 10 to 15 cm, depending on the desired length. To attach the fastener, simply pin it to one side of the velvet section before sewing the side seams, with the fold facing inward.
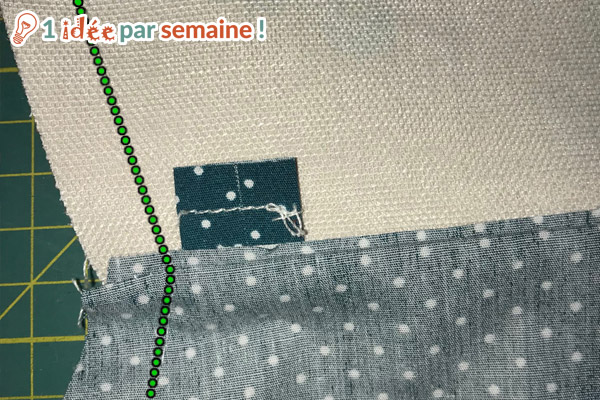
The finishing touches are almost identical to the simplified method: the only real difference is that you don’t sew directly over the zipper at all, but about 2 mm from the edge of each tab—that’s how you get “perfect corners”!
Sew up to the corner and stop right at the topstitch. Leave the needle in the fabric, raise the presser foot, rotate your pouch so it’s back in line with the seam, and finish the seam.
Above is a close-up of the seam: you can clearly see the 2-mm gap between the outer edge of the tab and the seam.
Close the bottom and sew the gussets as in the simplified assembly method, then trim the corners by cutting them on a bias. Next, turn the piece right side out through the opening at the bottom of the lining and shape the corners properly.
Finally, close the hole at the bottom of the lining.
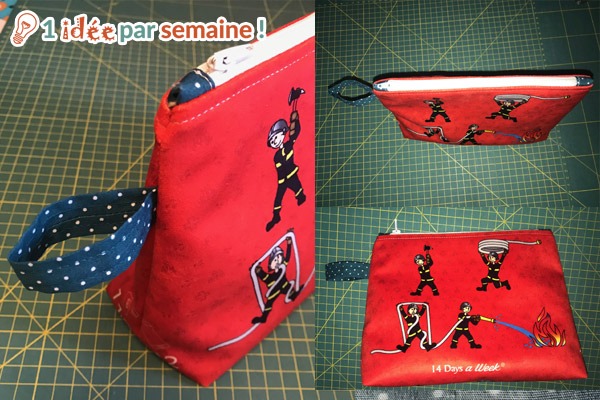
And there you go—your pencil case is all done!
Thank you for your kindness and helpful advice. Have a great rest of the show.
See you next year. Nicole.
Thanks, Nicole, it was a pleasure!
See you soon!